How can I spruce up my car for spring?
Cleaning some key areas can help to make your car feel a whole lot better.
With the nights getting shorter and the days longer, it’s fair to say that most people will be feeling a little bit brighter about the months ahead. With spring rolling through, warmer weather means it’s likely that people will look to give their homes a sprucing up.
The same can be done for your car, too. Particularly with lockdown restrictions having been in place for some time now across the UK, many vehicles won’t have moved as much as usual. So now is the best time to give it some much-needed TLC – and here’s how to do it.
Fluids and levels

>
While we’re here, it’s a good idea to give your car’s fluid levels a little check to ensure that they’re up to scratch. To check its oil, remove the dipstick (usually denoted with a yellow handle in the engine bay) and wipe it clean with a rag or some paper towel. Then, return it to the engine, and remove it once more – it should show you the amount of oil via a gauge on the stick itself. If it’s low, adjust accordingly with the correct oil for your vehicle.
Take a look at your windscreen washer fluid, too. Signified by a blue cap with a washer logo on it, the washer fluid bottle should also have levels to read. If it’s low, replenish it with proper washer fluid – don’t be tempted to use just water, either.
Tyres

>
If your car has been standing still for a little while then there’s a good chance that your tyres will have lost a bit of pressure. You can adjust them either via a home compressor that plugs into your car’s 12-volt socket, or a tyre inflator at a petrol station or garage.
Check the manufacturer’s recommended pressures – you can usually find these in the car’s handbook, behind the fuel filler cap or on stickers in the doors shuts – and adjust the tyres accordingly.
Interior

>
Right, now to get to the cleaning. It’s a good idea to start with a thorough vacuum, removing the mats to ensure that you get into all of the nooks and crannies. Don’t forget to vacuum down the sides of the seats, switching to a thin nozzle to get into the hard-to-reach areas. Give the seats a good going-over, too.
Now that you’ve vacuumed all of the key areas, you can start cleaning. Find a car-friendly carpet cleaner and work it into the areas like the carpet and seats – and don’t forget those mats, too. Use a stiff brush to work the product into the material, following the manufacturer’s guidelines regarding how long to leave it there.

Again, use a car-friendly cleaner to treat all of the harder surfaces throughout the car. You might want to use a bleach-free antibacterial cleaner to treat all of the most-touched areas such as the steering wheel and gearstick, too.
It’s worth giving the inside of your windscreen and windows a clean, too. Again, use a glass-specific cleaner here along with a clean microfibre towel to ensure a streak-free clean.
Exterior

Try and start with a pre-wash. There are plenty of specific cleaners out there for this job, including shampoos and ‘snow foams’ – the latter of which creates a snow-like coating on the car when used with a pressure washer. This first level of treatment helps to take all of that surface dust off the car while also loosening up more stubborn areas of dirt.
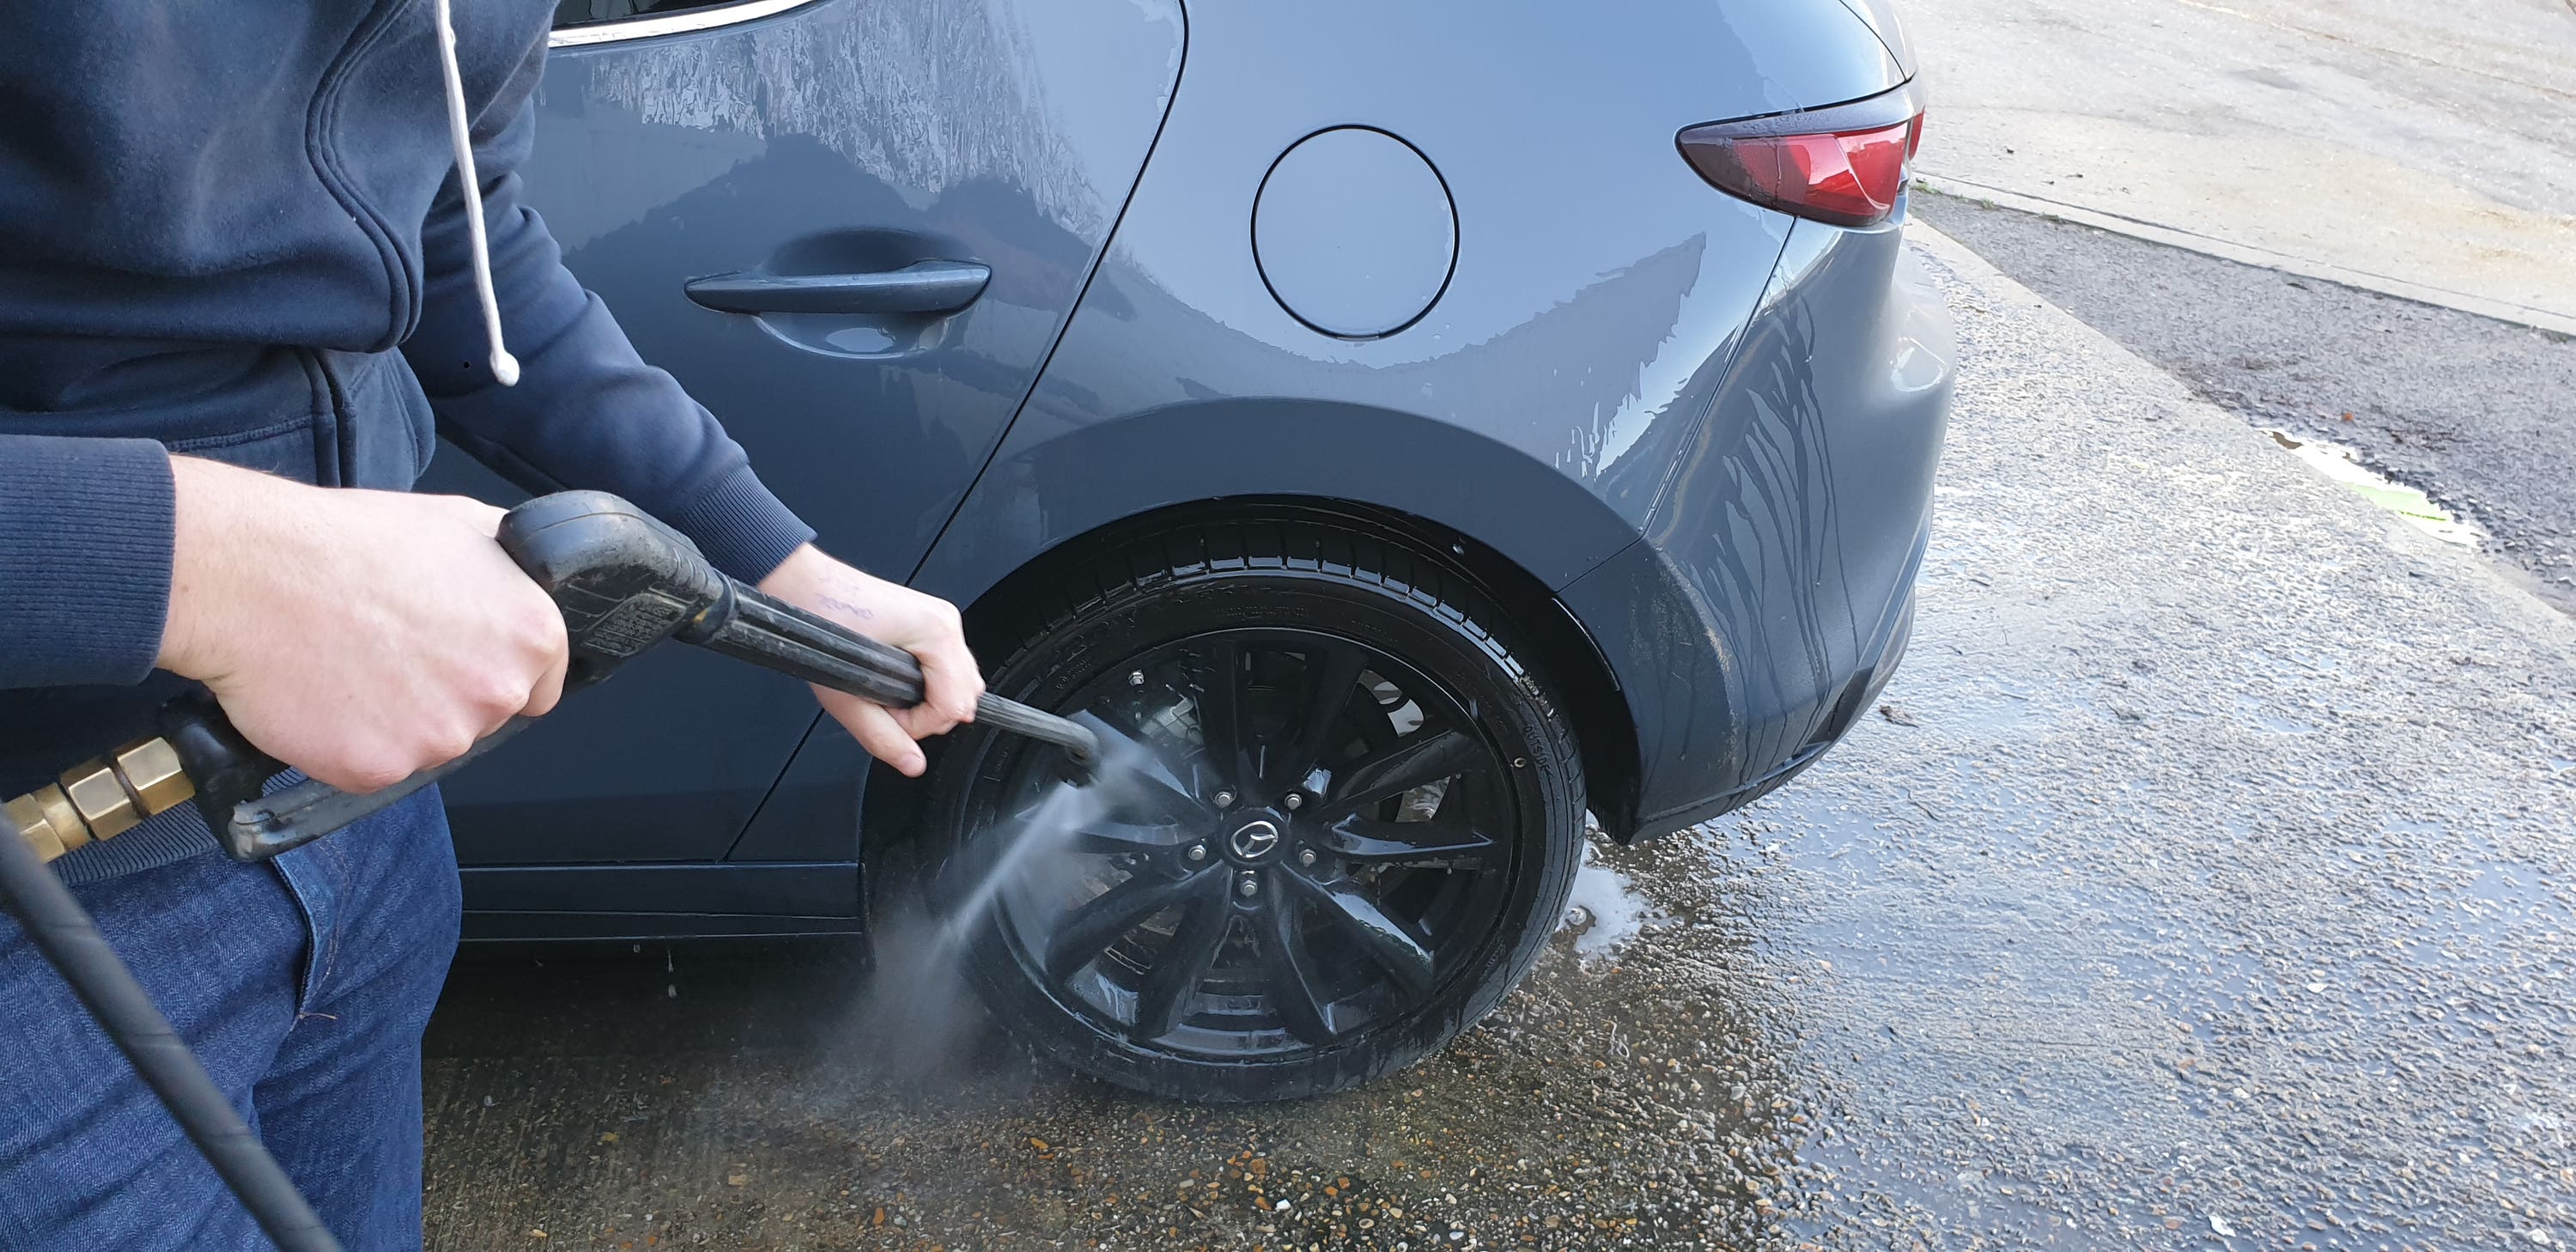
We’d also look to clean the wheels and tyres at this point. Though it can be tempting to do this last, doing so can mean you get water and dirt on your just-cleaned paint – so get it out of the way now with a bespoke cleaner.
Next, you can go in with a microfibre cleaning pad. Of course, in a pinch a sponge is fine, but make sure that it’s clean – you don’t want to accidentally cause damage to your paint by using a sponge that is dirty. Avoid using circular motions when cleaning too, as this can sometimes rub grit and sand into the paint and damage it further – go in straight lines and work from top to bottom, as these lower areas will be the dirtiest.
Don’t forget areas like the wheel arches and lower areas of the grille – these pick up the most amount of grit and salt over the winter months and require a little extra cleaning.
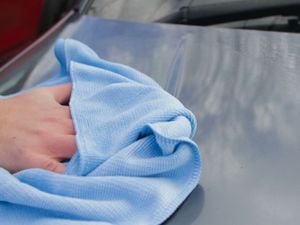
Once you’re done, it’s well worth cleaning off any water beads with a clean microfibre cloth – this will stop them from drying and leaving unsightly marks on your car’s exterior, ruining all of your hard work!